Serve multiple domains under one AWS CloudFront Distribution

When deploying workload on Amazon Web Services (AWS), it is a common to front a resources such as Applicaton Load Balancer, S3 website or an EC2 web server with AWS Cloudfront to accelerate content delivery to end users. Sometimes, you want to direct both the root domain, “williamtopics.com” and its sub-domain “www.williamtopics.com” to the same resource just like my blog. I have described how I achieved this in the following steps below.
- Create an AWS CloudFront Distribution:
- In the AWS Management Console, go to the CloudFront.
- Click Create Distribution
- Configure your distribution settings, including the origin domain (the source of your website content), caching behavior, and so on.
- Under Viewer protocol policy select Redirect HTTP to HTTPS
- Under Cache policy, select CachingOptimized
- Scroll down to the Setting section, in the Alternate Domain Names (CNAMEs) field, click Add Item and enter the root domain “williamtopics.com”, click Add Item again and enter the subdomain “www.williamtopics.com”.
- Under Custom SSL certificate, click the dropdown and select SSL certificate. Note that the required SSL certificate should be issued aganist a root domain “williamtopics.com” and not a subdomain such as “www.williamtopics.com”. If a certificate is issued aganist a subdomain, it can only be used for that subdomain.
- If you have do not have SSL certificate, follow the below steps
- Go to AWS Certicate Manager.
- Click Request a Certificate and select Request a public certificate
- Enter your root domain name “williamtopics.com” in the Fully qualified domain name field.
- If you have access to the email address used to register the domain name, select email validation under Validation method Otherwise, select DNS validation.
- Then click Request to request SSL certificate.
- Approve the confirmation sent to the email address, the SSL certificate will be issued instantly. The status should change from Pending to Issued.
- Go back to Cloudfront and select the new SSL certificate
-
Click Create Distribution. Note the CloudFront domain name (e.g., d12345abcdef.cloudfront.net).
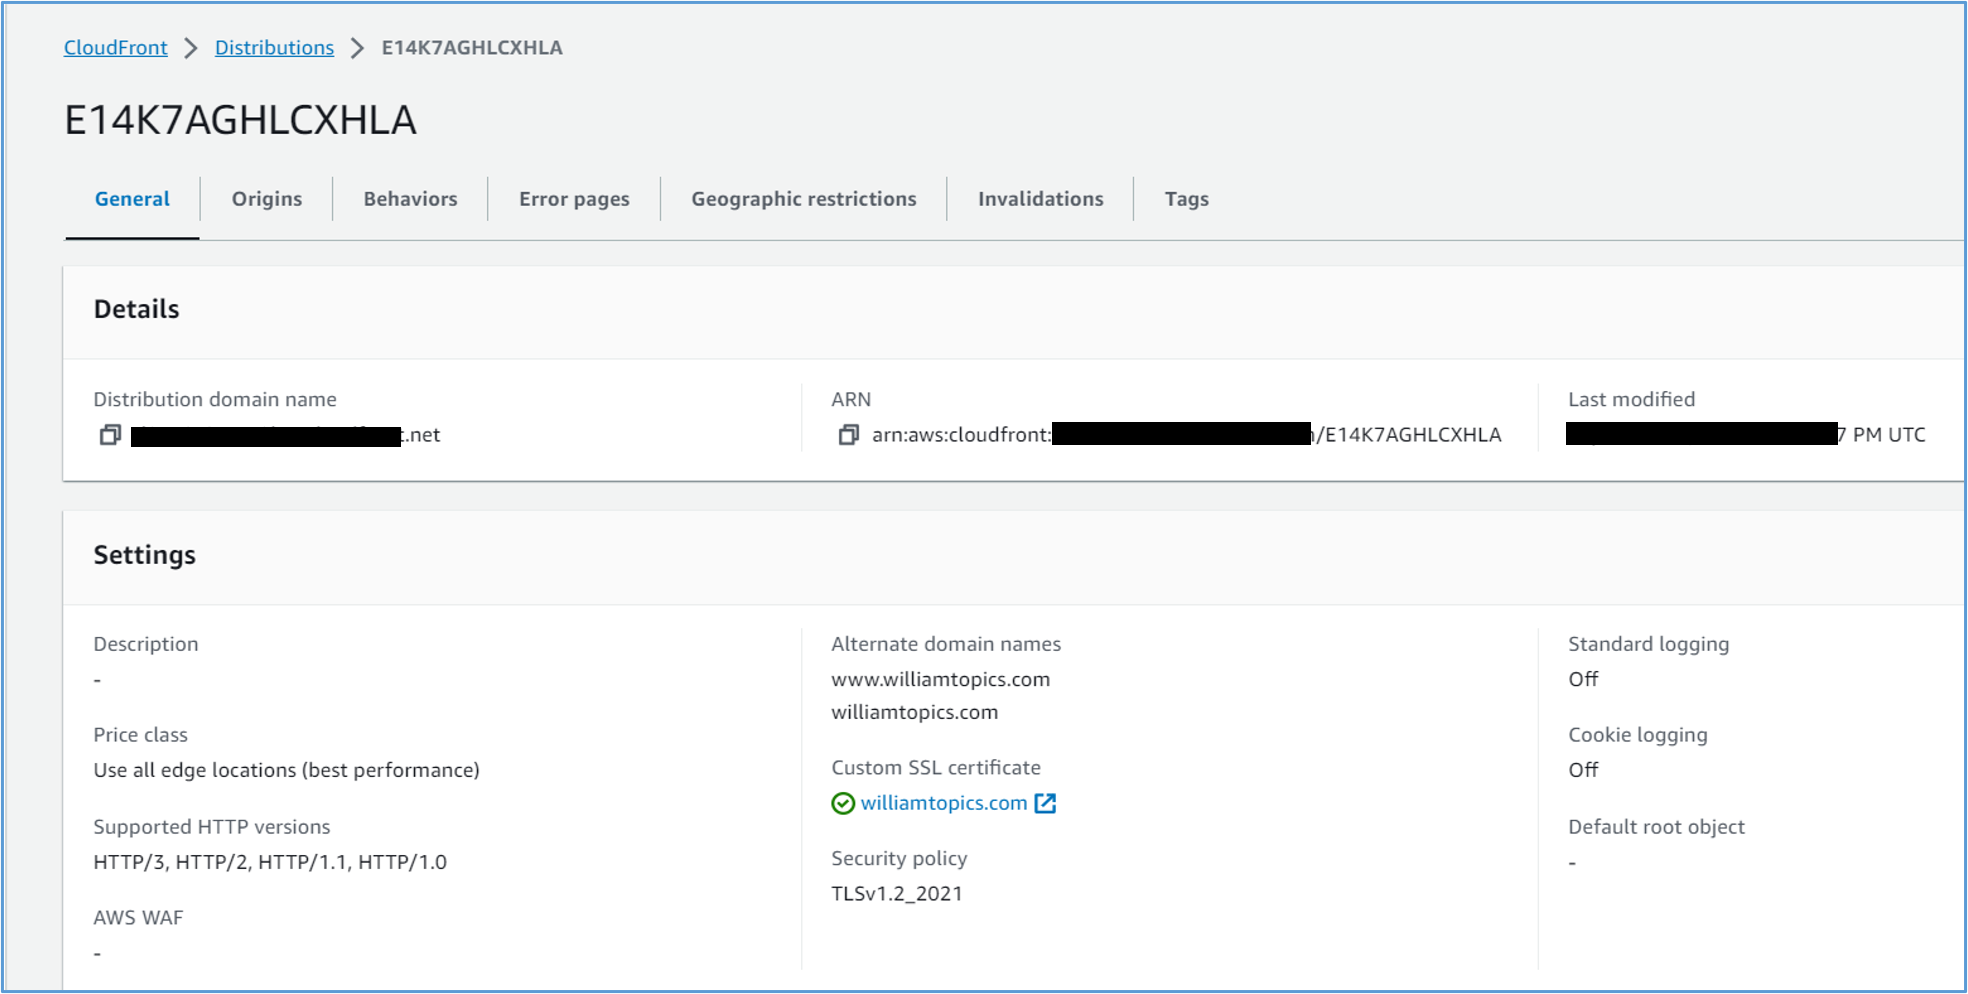
CloudFront Dashboard showing configuration
- Configure Amazon Route 53:
- In the AWS Management Console, go to the Route 53 service.
- Click Create Hosted zone, enter your root Domain name, select Public hosted zone under Type and create zone.
- Go to the newly created Hosted zone and click Create record. You will create two sets of record, one for the root domain and the other for the subdomain.
- To create the record set for the root domain, leave the Record name field blank.
- Choose the record type “A.” Note that record type “A” is for IPv4 while “AAAA” is for IPv6.
- Select the toggle button for “Alias Target” field, then select your CloudFront distribution from the dropdown list.
- Click Create records.
-
Create a record set for the sudbomain following the same steps as for “williamtopics.com.” Enter “wwww” in the Record name field.

CloudFront Dashboard showing configuration
- Update DNS Settings:
- Lastly, in your domain registrar’s DNS settings, update the nameservers to use the Route 53 nameservers provided in your hosted zone settings. This step may take some time to propagate through the DNS system.
Now, both “williamtopics.com” and “www.williamtopics.com” should route to the same CloudFront distribution, serving content from your desired origin. Users who enter either URL will be directed to the same resource.
Remember that it can take some time for DNS changes to propagate globally, so there might be a delay before the new configuration takes effect for all users. Additionally, make sure your CloudFront distribution and S3 (or other origin) settings are correctly configured to serve your website content.